> ## Documentation Index
> Fetch the complete documentation index at: https://docs.coralos.ai/llms.txt
> Use this file to discover all available pages before exploring further.
# Quickstart
> CoralOS Quickstart
## What is CoralOS?
CoralOS is a platform for deploying and orchestrating agents that connect easily (with each other, your application, agentic middleware, ...)
CoralOS consists of the Coral Server and supporting tooling/ecosystem.
Think of CoralOS as the "Kubernetes for agents": you have a HTTP API, like a control plane, that lets you spin up a graph of agents with fully controlled lifecycles.
### What makes an agent a CoralOS agent?
The basic requirements for an agent to run via Coral and be fully interoperable with the ecosystem are:
* it can run in a container
* it connects to the supplied unique MCP server URL passed to it
With just those met, a whole host of things become possible:
* Custom tools can be provided to any agent by the consuming application
* Agents can discover and work with the other agents they are in groups with
* Their lifecycles are fully managed, with configurable time-to-live for cost predictability.
### What are some more advanced features of CoralOS?
CoralOS makes many more interesting things easy:
* Pushing your agents to a [marketplace](https://marketplace.coralprotocol.ai/), where they may be used securely for free or become their own revenue streams
* Agent re-usability via [exposable configuration (options)](/reference/agent/tables/options)
* Safely intercept & manipulate LLM requests in-flight, to e.g. patch prompts, add memory to memoryless agents, or change the model used; without touching agent code (in-flight manipulation features coming soon)
# Getting started
You can try out CoralOS right away with some pre-built agents using [Coral Cloud](https://coralcloud.ai/).
The operation of Coral Cloud is very similar, though currently it doesn't support using your own agents.
For a deep dive on using Coral Cloud, see [this guide](/cloud/using-api)
Running the server is easy:
You will need a Coral Cloud API key in order for the server to proxy LLM requests to any of the supported LLM providers.
More details on this can be found [here](/reference/server/cloud).
```bash git + gradle theme={null}
# Start server (logs show in this terminal)
git clone https://github.com/Coral-Protocol/coral-server
cd coral-server
./gradlew run --args="--auth.keys=dev --cloud.api-key=coral..."
```
After the server starts, it prints an address to the Coral Console. You can "login" with the auth key `dev` or whatever you passed for the auth.keys parameter.
Make sure to use a secure auth key in production, and follow conventional security practices when exposing your Coral Server to the public internet!
Let's create a new agent from source to use in our server.
We will use a template for convenience, but writing agents in any framework (or modifying existing to work with Coral) is also easy.
See [this guide](/guides/writing-agents) on writing agents for more information on agent requirements.
```bash npm theme={null}
npm create koog -- my-first-agent --agentName=my-first-agent --packageName=com.example.myfirstagent --keepWorkflows=true --keepPublishJvm=true --keepPublishNative=true --keepReleasePlease=true
```
```bash git + gradle theme={null}
git clone https://github.com/Coral-Protocol/coral-koog-agent my-first-agent
cd coral-koog-agent
./gradlew hydrate my-first-agent
```
This will create a Kotlin agent using JetBrain's wonderful [Koog framework ](https://docs.koog.ai/)
You should now have a file structure that looks something like this:
`coral-agent.toml` is Coral's entrypoint to this agent, with all relevant agent metadata (runtime, options, etc).
Learn more about it [here](/configuration/agent)
| Language | Framework | Maturity | Repositories |
| -------- | -------------- | -------- | ---------------------------------------------------------------------------------------------------------------------------------- |
| Rust | coral-rs (Rig) | Low | [Deepwiki Agent ](https://github.com/Coral-Protocol/agents/blob/main/rust/agent-deepwiki/src/main.rs) |
| Kotlin | Koog | High | [Template ](https://github.com/Coral-Protocol/coral-koog-agent) |
| Python | LangChain | Low | [Template ](https://github.com/Coral-Protocol/langchain-agent) |
Missing any? Come to [our discord ](https://discord.gg/2subZkSWWu) to share your own examples or ask for relevant ones.
Once you have an agent's source code on your machine, you can "link" it so that any server you run on that machine will have access to it:
```bash theme={null}
cd my-first-agent
npx @coral-protocol/coralizer@latest link .
```
On Windows, you may need to run as administrator to avoid permission issues creating the symlink
This creates a symlink called `~/.coral/agents/my-first-agent/{agentVersion}` pointing to your agent's directory
To "unlink" this agent, you can run:
```bash theme={null}
unlink ~/.coral/agents/my-first-agent/{version}
# replace {version} with your agent's version (as seen in the coral-agent.toml)
```
Now that you have agent(s) in your server, you can create a multi agent session!
Creating a session can be done in [one POST request](/api-reference/local/create-session), but for a more convenient experience, you can use Coral Console.
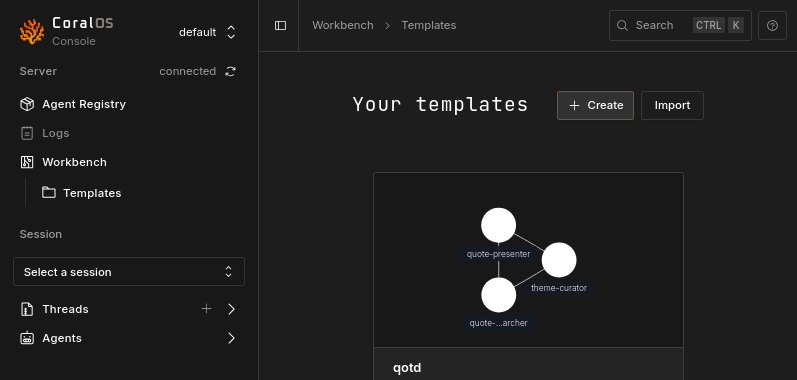
Open your browser and go to [http://localhost:5555/ui/console](http://localhost:5555/ui/console)
Click on 'Templates' under 'Workbench', then create a new template
 Click `Add an agent` to add an agent to the template
Depending on your agent(s), you may need to fill out some values here.
You must also set the session's TTL (time-to-live), which determines how long the session can run before it is automatically terminated.
Optionally, save the template you just created
Run the template you just created to start a new session with your agent
1. Go to the session you just started under "Session" in the sidebar
2. Check out the agents and their logs
3. Check out what's going on in the threads
Ultimately it's intended that Coral sessions are instantiated via code. Coral Console provides the needed JSON payload for the [create session endpoint](/api-reference/local/create-session), as well as code snippets that include making the request.
Coral Server requires a bearer token for all endpoints. We set our auth key to `dev` in [Step 1](#run-the-server), so we must use the header `Authorization: Bearer dev`.
In the case of Coral Cloud, it must be an API key you create from your [account settings](https://coralcloud.ai/account).
Make sure to use a secure auth key, and follow conventional security practices when exposing your Coral Server to the public internet!
Naturally, variable substitution and environment variables should be used over hardcoding every option value, since sensitive information like API keys can be passed as agent options.
That wraps up the CoralOS quickstart!
Click `Add an agent` to add an agent to the template
Depending on your agent(s), you may need to fill out some values here.
You must also set the session's TTL (time-to-live), which determines how long the session can run before it is automatically terminated.
Optionally, save the template you just created
Run the template you just created to start a new session with your agent
1. Go to the session you just started under "Session" in the sidebar
2. Check out the agents and their logs
3. Check out what's going on in the threads
Ultimately it's intended that Coral sessions are instantiated via code. Coral Console provides the needed JSON payload for the [create session endpoint](/api-reference/local/create-session), as well as code snippets that include making the request.
Coral Server requires a bearer token for all endpoints. We set our auth key to `dev` in [Step 1](#run-the-server), so we must use the header `Authorization: Bearer dev`.
In the case of Coral Cloud, it must be an API key you create from your [account settings](https://coralcloud.ai/account).
Make sure to use a secure auth key, and follow conventional security practices when exposing your Coral Server to the public internet!
Naturally, variable substitution and environment variables should be used over hardcoding every option value, since sensitive information like API keys can be passed as agent options.
That wraps up the CoralOS quickstart!